Thursday, September 22, 2011
Photomatix- Having Some Fun
I was working on an image in Photoshop, but wasn't getting what I wanted. If I spent more time on the file I would have eventually got what I was after. Anyway, I decided to go to Photomatix. I got what I was after on the first try, and then decided to have a "fun episode" again. What I did was simply take single or multiple images and then process then in Photomatix in either tone-mapping or HDR. Just to remind everyone, HDR is an acronym for "high density range". This term simply means that your photo or scene (that you will photograph) has too big a spread between the brightest and the darkest tones. Just remember that there's nothing wrong in "losing" detail in these tones, but in the "pro World", your client 99% of the time want his/her product to be seen entirely! Tone-mapping is a process whereby you take 1 or several images and combine them to create a "dramatic lighting". The different bright and dark areas (highlights and shadows) are taken from the single or several images and then "blended" to come up with the "dramatic lighting".
BDE (Before the Digital Era- my own acronym), a person by the name of Aaron Jones invented and patented a lighting machine that was called "Hosemaster". It is a light unit with a high-intensity light bulb (like a slide-projector bulb, whose light passes through a fiber-optic tube to reach the end of the hose. Different-sized heads are used for different effect. He also, I believe invented the term "light-painting", because that is exactly what you do. In total darkness, you take the head of this light unit, and "brush" or "paint" different parts of an item or scene. This is all done in the studio. The results are super! In the BDE era, you needed lots of Polaroid film to get the exposures correct, and then you applied the technique to film. Aaron also added a large separate shutter in front of the camera that could open and close (while the camera lens was entirely open all the time). Exposures anywhere from 5 seconds to up to 20 seconds were usual, and the whole "light painting process" could take as much as 15 minutes just to do 1 shot!
What tone-mapping or HDR do is what Aaron Jones invented, but in a much easier manner, and with less time. I will do an instalment either in this blog or in my ProPhotoLearning Blog to show you how it's done. The process can also be done outdoors with a flashlight or even a camera flash.
The Process
1. Find Your Photos
I use Lightroom, although any filing software or even the software that comes with your camera will do.
I use Lightroom, although any filing software or even the software that comes with your camera will do.
2. Load Your Images
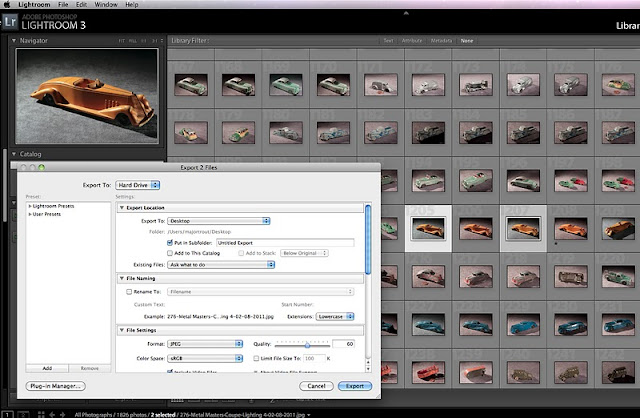
3. Export Your Selected Photos to the Desktop or wherever you want.
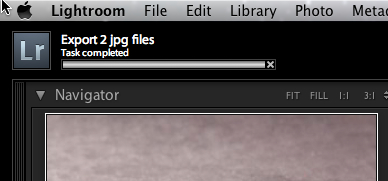
4. Lightroom had a moving line to let you see how much longer the export will take.
These softwares sure are getting more user-firendly!
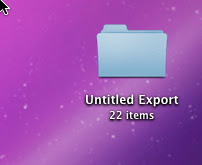
The files (photos) are exported to wherever you want them
I placed mine on my desktop.
Notice that Lightroom places them in a file, to which you can then re-label.
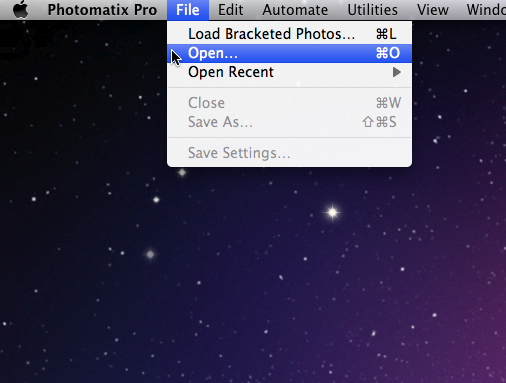
5. Close Lightroom unless you have lots of RAM memory and then open your files in Photomatix
6. Inform Photomatix what you'd like to do (tone-mapping or HDR)

3. Export Your Selected Photos to the Desktop or wherever you want.

4. Lightroom had a moving line to let you see how much longer the export will take.
These softwares sure are getting more user-firendly!

The files (photos) are exported to wherever you want them
I placed mine on my desktop.
Notice that Lightroom places them in a file, to which you can then re-label.

5. Close Lightroom unless you have lots of RAM memory and then open your files in Photomatix
6. Inform Photomatix what you'd like to do (tone-mapping or HDR)
7. Another Menu Instruction - Load Your Images Into Photomatix
8. Make sure your photos have a different exposure
Remember that it's the different exposures and intensities that will
create the drama in the final combined image. If you only have 1 image, you can create several "slightly different ones in Photoshop or any other imaging software and save them".
9. I simply changed the E.V. differences between my same-exposure images to 1 1/3 from 1/3, and then load them for processing.
10. Here's where I finally load them into Photomatix
11. You will have the above window appear once you process your images in Photomatix.
You can change the large image:
a. By clicking on the small photos below the large image
b. By pressing on "Lighting Adjustments" in the left vertical menu next to the bumper of this car.
This is the "medium" using the vertical menu to the left of the bumper
This is the "natural" using the vertical menu to the left of the bumper
This is the result of using the bottom menu, specifically using the white bordered car
And yet still 1 more variation
Once you're finished, you then save the image somewhere.
Below is a sampling of some toys that I selected for the 2 processes.
Thanks once again for dropping by, and I hope this post perked your interest.
Have good morning, good afternoon, or good evening wherever this message will find you.


No comments:
Post a Comment