Saturday, January 29, 2011

Some Examples of Restoration

January 29, 2011


I've already written about how to actually go about stripping paint from an old toy, applying primer, and new paint. In today's entry, I'll just present you with some example of what I've done.

I'm not 100% pleased with hand-painting, and I've been told that to do a good job, you need to use an airbrush. At this point in time, I don't want to spend any more money, because I re-sell these toys on e-Bay, and the investment just isn't worth the return.


You can use spray paints form your local hoppy shop, and 1 of the large automotive parts  companies can custom blend a paint colour and fill up an aerosol can with the fresh paint. However, this will cost you about $ 25.00 - $ 30.00, compared with a small can (40cc or 2 oz)  of toy model paint for about $ 2.00.


Friday, January 21, 2011

The Hubley P-38 Airplane

January 21, 2011

One of my favourite vintage toy airplanes is the Hubley P-38. It was produced in the late 1940's and 50's.
If you go to  http://en.wikipedia.org/wiki/Lockheed_P-38_Lightning you can read up on this airplane that was manufactured by the Lockheed company during WWII. It was a successful fighter mostly in the Pacific war with Japan, although it did see action in the European Theatre.


                                   The 2 photos above illustrate the 3 tires and landing gear


The 2 photos above illustrate the  top design of the aircraft

What makes these toy airplanes one of my favourites is the many parts that can be played with . There are the propellers, as well as the 3 landing gear/tire combinations. However, it's the tactile touch and surface texture and design that also adds to the thrill of owning one of these toys. Below is a plane against a white background, along with a close-up of the texture. Probably, the texture was meant to illustrate the rivets that  attached parts of the sheet metal together.


You can find these planes on e-Bay, and through toy antique dealers. However, rarely do you find these planes complete. Usually, a propeller is broken, a wheel or 2 is missing, and the wheels and landing gears may be absent.

Luckily, because these are so popular,there are several sellers of reproduction (new) parts for these airplanes. 2 in particular are are:

www.thomastoysantiquetoyparts.com

&

www.classictintoy.com


Thursday, January 20, 2011

To Restore or Not to Restore; That is the Question!

# 5 - January 20, 2011


Most antique and vintage items on E-Bay are in their original condition. The percentage of restored toys on e-Bay is probably less than 1%. However, there are some people who enjoy restored toys just for their vintage looks, rather than for their monetary value. Of course, some restored items will fetch good prices.

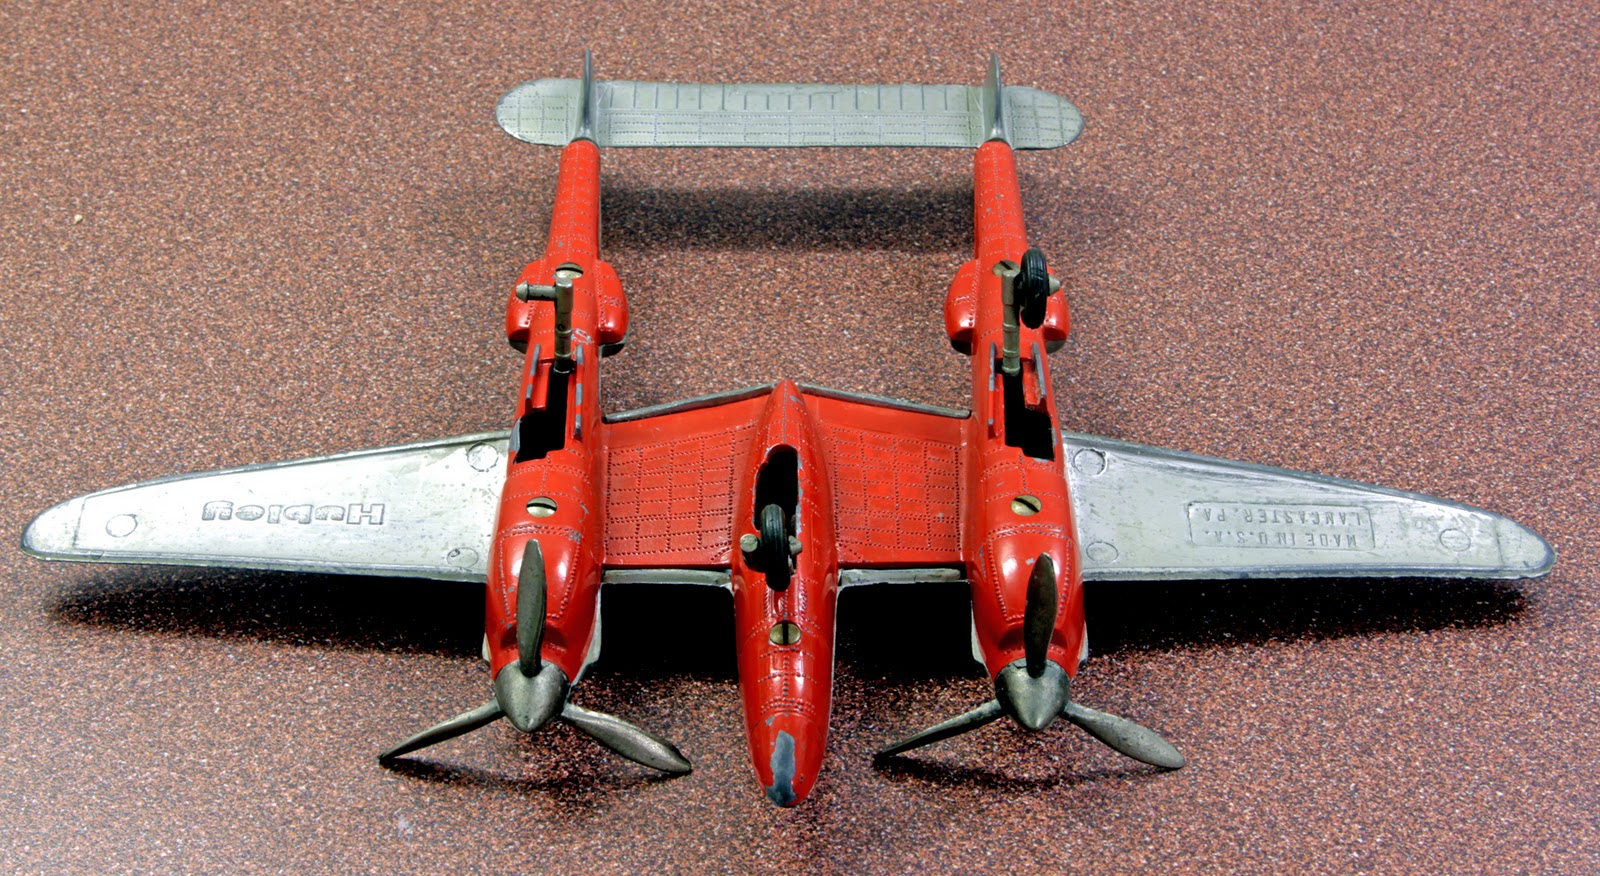
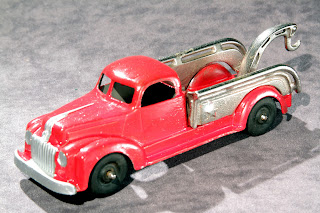
For this article, I've posted Hubley vintage tow trucks. Personally, I like then either restored or unrestored. However, as a seller, they're easier to sell unrestored. I have mostly restored these Hubly tow trucks in terms of just sanding and repainting. They've sold to people who liked the "finished new look", and I was proud of my work. I sold 1 re-painted Hubley tractor, and the buyer wrote to say that this restoration was the best one he had from all his toys - I was definitely floored!

As with most new learning, you learn as you go. With the Internet, you always have instant knowledge from an infinite amount of resources.

Safety notes:

1. Wear safety glasses
2. Wear a breathing mask if removing pain in a confined area
3. Wear long-sleeve shirts to avoid getting corrosive materials on your skin (e.g. paint remover or stripper)
4. Wear hearing protectors. Buy a good set of those half-moon types with replaceable inserts. I use these for also mowing the lawn! I've tried ear plugs, but to me, they're useless, and don't block the sound enough!
4. Use disposable plastic or latex gloves when stripping paint from toys.
5. Use old leather gloves when using the Dremmel or when removing rust.
    *Do not use latex gloves. You may find they'll catch on the turning spindle of the unit!
   The leather gloves will protect you from the fine wire hairs that fall off form the wire brush attachments  for the Dremmel. SOme of the wire splinters are so small you won;t see them unless you wear glasses, but they hurt like heck!
6. Work in a well-lit area.
7. Work in a well-ventilated area or even outdoors for paint removal and paint  stripping.
8. Most vintage or antique toys will have lead-based paint. This is further reason to wear a breathing
    mask.
9. Dispose of all stripped paint, and dust in a proper recyclable centre.


When actually working:

1.  Use a Dremmel high-speed tool to remove dirt and rust.
2. You can use a wire brush for starters, and then different grades of sandpaper (by hand).
    Eventually, you can use 1000 or even 2000 grade automative sandpaper for that final smooth sanding.
3. If you have access to a sandblaster, that works better than having to use the Dremmel and hand sandpapers.
4. When you are finished with the sanding, carefully wash the toy to remove all hints or traces or oils and
    grease.
5. When the toy is completely dry, add an automative primer. I like to use Humbrol hobby paints for re-painting the toys. However, their primer did not seem to have good sticking power, ergo someones's suggestion from e-Bay to use automative primer. Now that sticks! However, to be fair to Humbrol, I did not wash the toys in soapy water!
6. There are other brands out there besides Humbrol, but I like their paints for the variety of colours.
    Spend the money on good brushes, and buy different sizes for different area (small or large).
    Clean them after each use. Wipe them on a rag, then dip them in paint thinner. Uuse several
    small glass or metal cans. The first can is for removal or most of the paint. The second one if for
    removing that "tinge" that is still there.
7. Stir the paints for about m minutes, and when finished clean the body of the small can, so that the lid will seat tightly on the can top.
8. Try to work in a place that is clean and free from dust. You can't see dust, but you won't believe how
    much there can be when your toy is finished drying.
9. Someone suggested to me to place the toy in a box and cover it, so falling dust would be mimimized.
10. Wait 24-48 hours for the paint to harden.
11. USe a fine sandpaper to give the paint a rough surface to have the second coat (or third coat) stick better.
12. You can buy these paints in gloss or matter, and they even have a clear matt finish.
13. You can use latex-based paints or even spray-can paints if you want.
14. Some automative retailers will even customize a paint colour for you, and put it into an aerosol can.
      This of course is relatively expensive.

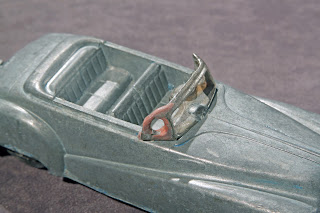
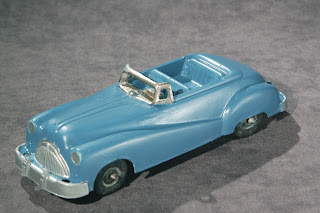
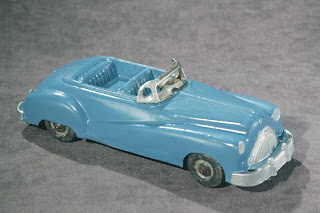
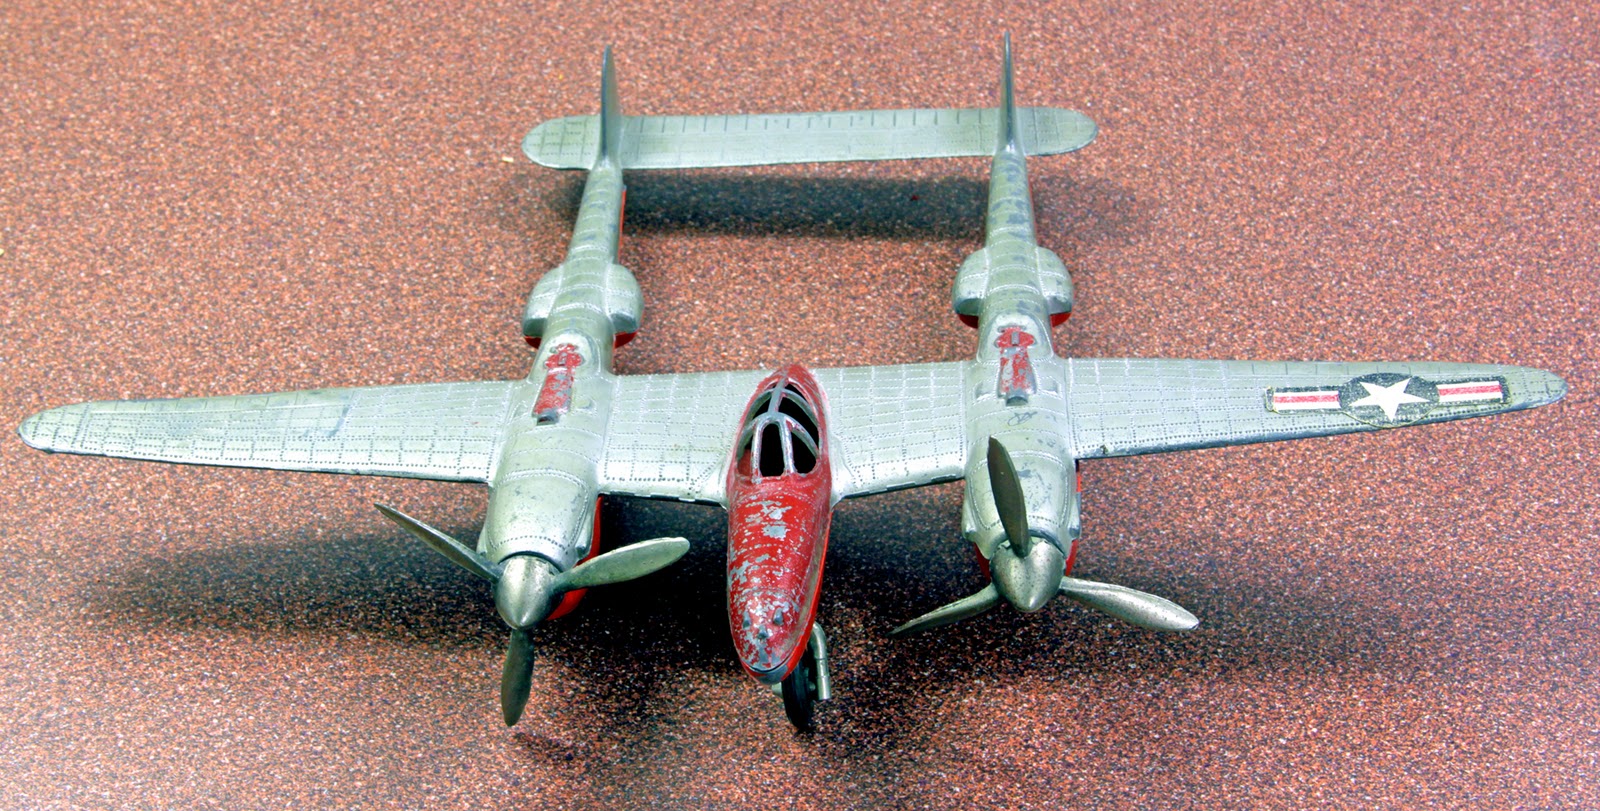
Enough said, so here are the unpainted and re-painted items that I have sold on E-Bay.


Don't forget that you can double click on a photo to enlarge it.

Wednesday, January 19, 2011

Lighting Continued - Harsh and Soft Light Sources

In this post, I'll discuss some simple lighting set-ups, along with what they do.

The 2 set-ups are:

1. Harsh lighting
2. Diffused lighting

Harsh lighting can be defined as a light directly from the source, without any alteration.

Soft lighting can be defined as a light that has been altered such as by placing a material in
front of the source to soften it, or to bounce the light off a white or metallic reflector.


             Harsh Light                                                      Diffused Light

1. Strong bright areas (highlights)                       1. Soft bright area  (highlights)
2. Deep shadows - very little detail                     2. Softer shadows - more detail


Harsh Light

Soft Light

In the above 2 examples above I have a harsh light set-up and a soft-light (diffused) set-up. These are finished images form 2 light sources and 2 reflectors. I'll illustrate the lighting procedure below, so that you can actually see what the lights and reflectors are doing.

A Direct (Harsh) Light Source Set-up


1. Main light - 11:00 o'clock position about 7 feet high, and aimed 45 degrees downwards
2. Main light with a fill light. The fill light is at the 5 o'clock position, at 6 feet high and aimed downwards at 45 degrees.

3. Main light with a fill light, and a silver reflector aimed to the front of the car on the right (grill).
4. Main light with a fill light, and 2 silver reflectors-1 aimed to the front grill and 1 aimed to the side of the car. The last reflector creates "subtle" reflections. Look at the large highlights (bright spots) on the metallic wheels, and a small highlight on the right hand.*

*By double-clicking on an image, you can enlarge it to look at more detail.


The Doepke Sand Movers

January 19,2011
Third Blog of the day

Some of my more favourite (favorite, for American spelling) toys are the Doepke Barber-Greene bucket loader and the  Doepke Barber-Greene track loader. These were made in the late 1940's and early 1950's, and you can find information on the Doepke toy company by doing a search with any search engine.
Photo 1

Photo 2

Photo 3

Photo 4

The 4 images above are of the Doepke Barber-Greene track loader.  This toy is about 14" (L) x 5" (W) x 12" (H) and weights about 3 pounds. It was a substantial toy for its' times and cost about $ 13.00, also a lot of money for  a toy ,for a period just after WWII.

The top 2 images illustrate the movements of the item. This toy was meant to play with in the sand. The crank on the side turns 2 augers (earth churners) that push dirt into the small buckets. These move again, from the turning motion, and then drop on to a conveyor belt. The conveyor belt also moves, and then "dumps" its' load into a dump truck (Not shown of course) that would be positioned under the end of the belt.

I'm not sure which of the 2 Barber-Greene toys came first or if they both were released at the same time, but the other toy can be seem below. It's also substantial, and very mechanical - a great hands-on toy to play with.


The Doepke Barber-Greene Track Loader came in 2 colours - green and orange. The last photo, immediately above, shows the 2 sand-churning augers at either side of the small bucket.

Photographic Lighting for Toys

January 19, 2011 
Blog # 2


I've never created a blog or blogged, so I might as well go all out and add a second article today. It will be all about photographic lighting, although in this blog related to toys.

I taught pro photography for close to 32 years, and the change from film to digital was humongous! I was a purist film person, but now, I would never dream of going back to film. Digital truly is a revolutionary invention that has remarkably changed mankind forever.

If you look closely at the above stagecoach image, you'll see 2 shadows, which are from 2 lights. I use a brand of light called LTM, but even the sun and a reflector will do.

There are usually at least  2 lights used in photography. The main light create the direction from where the light is coming from, and also create 3d (form) or shape (2-D or silhouette).

The fill light adds light into dark area of the photo that the main light does not hit. In doing so, detail is shown in these areas. Don't worry if you're not catching on yet. I  will add much more detail and explanations in the future, so that you will better understand this important topic.

The fill light is positioned high, and can be softened ( with diffusion material), so that its' shadows do not conflict with the shadows of the main light. The fill light is also weaker than the main, so that shadows still exist, but the detail is seem much better.

In the stagecoach image, I've labelled the 2 lights by their shadows, so that you will know that 2 lights were used.


You can see 2 shadows for this item  of a horse and a seated racer called a "sulky". What is important when using multiple lights is to make sure that the fill or any other light (non-main) does not present its' shadow too boldly. The reason for this is that we live on a planet with only 1 light source - the sun, hence, artificial lighting must also follow that course or "rule".

Here's another image below.


The lighting  in these 3 images all are the same. The reason for this is that I sell antique and vintage toys on E-Bay, so it's convenient for me to use the same lighting , which is set up in part of my house.The main light is positioned at about 11:00 o'clock, while the fill light is positioned at about 7:00 o'clock and very high. Positioning the fill light high allows its' shadow to fall behind the subjects and be hidden. This then allows the main light's shadow to be most prominent.

The Search Starts

January, 19,2011

Hello everyone

Welcome to a new blog on antiques. I just retired, and by a chance of luck came upon almost unused (2) sets of Meccano . For those who don't know, these are what are called "erector sets". The old antique sets were made of metal, and the nature of the toys was to construct. They were invented in Great Britain, and geared towards the young, although today, many "young-of-mind" collectors search out these items.  The sets came with various lengths and shapes of metal, various colors, nuts and bolts and small tools to have the pieces join.


You can imagine how elated I was when I came across these sets. Below is the other set.


These 2 sets were produced in the 40's and 50's. Their red and blue piece colours identify them from that era. Anyway, someone found these here in Montreal, I purchased them, and then e-mailed a few people from a Meccano club in England to check out the demand. 1 person eventually bought the item, and it now has come back to reside, actually in Ireland.