Sunday, July 31, 2011

Picasa - Using the Free Photo-Editing Software

July 31, 2011

Today's addition has to do with Picasa Software. I decided to download the Picasa software in order to see what it could do.  I had seen another bad photo o E-Bay, and an item I purchase was so out-of-focus that I didn't notice a part missing. People are either "lazy" or can't be bothered to present high-quality images. Furthermore, there is so much free software out on the Net, that there is simply no excuse!


Picasa Icon

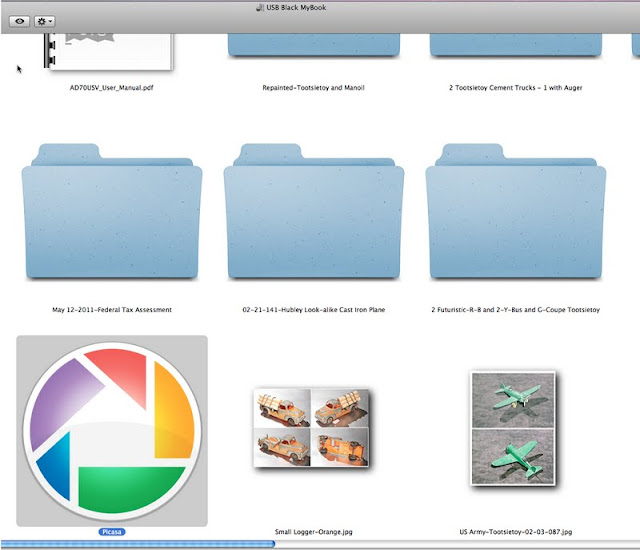
I download the software to my back-up hard drive.
This helps in keeping the capacity of my main drive low 
so that I have plenty of space on there to work with.

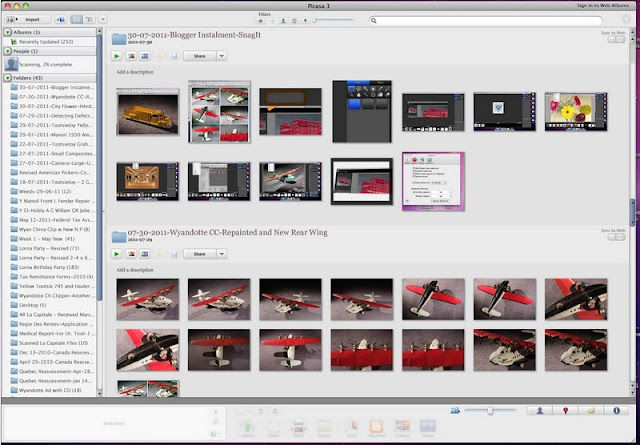
Main Menu View of Picasa
Looks familiar doesn't it? This resembles the main menu of Aperture or Lightroom, 
and you get this program for "free"!

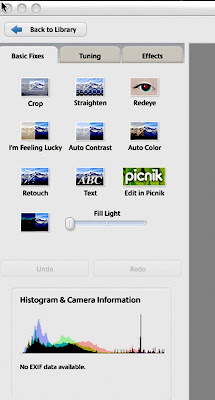
The "Basic Fixes" Window
This is 1 of 3 windows to photo-redit.
It's quite simple and easy to learn.

My Colour-Balance is always "off" by being red.
I should do a "custom-balance" in my camera but I don't.

The off-colour red had been fixed with the "Auto-Color" Tool.
It does a very good job!

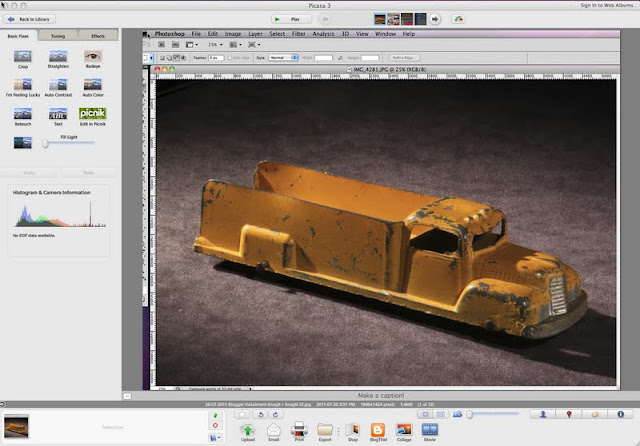
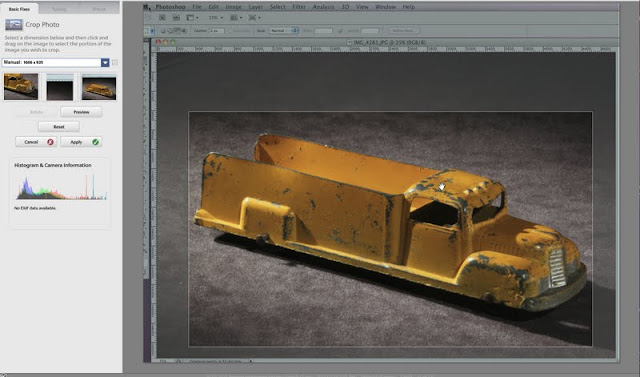
The "Crop Tool" Menu


The Tootsietoy Re-cropped

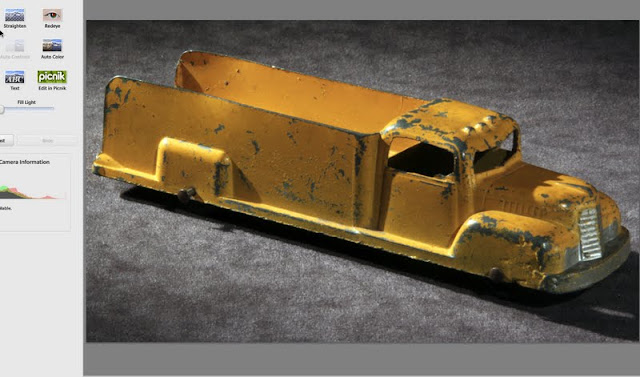
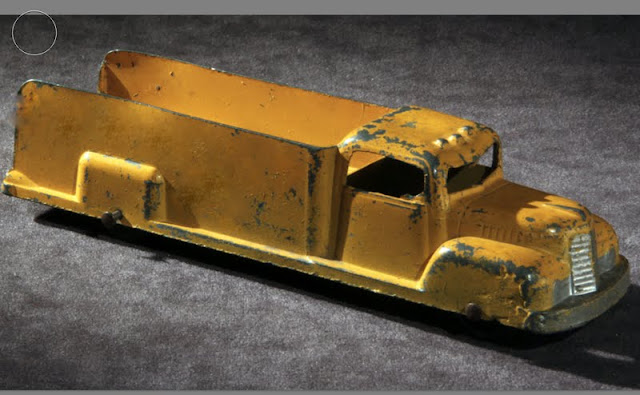
A "Retouched" side of the truck
Quite good again, and easy to learn and work with!

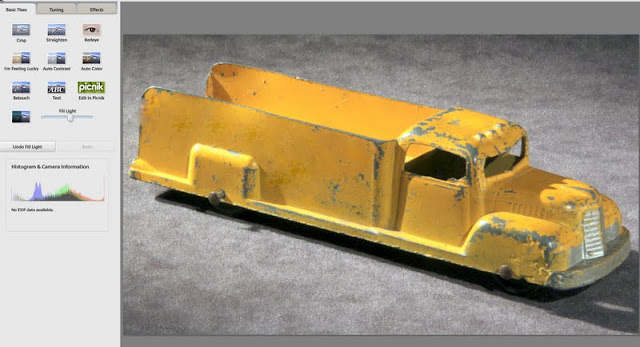
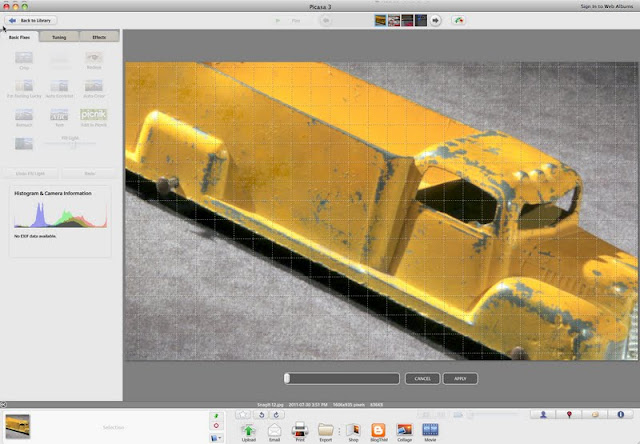
The "Fill Light" command.
This tool adds light into the darker area to provide nice detail.
The bright areas remain almost the sam intensity.

The "Tilt" command exaggerated

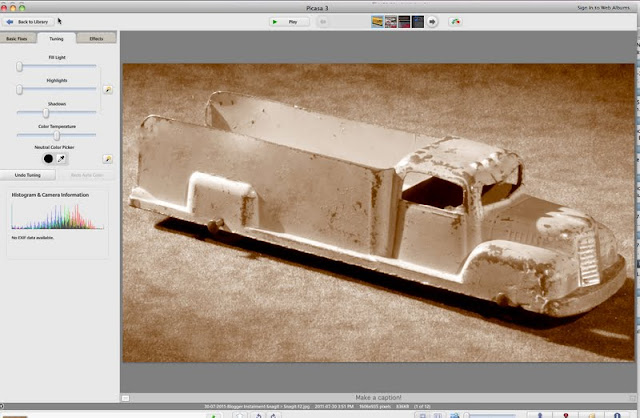
An enlargement of 1 of 3 main menus - The "Tuning Menu"

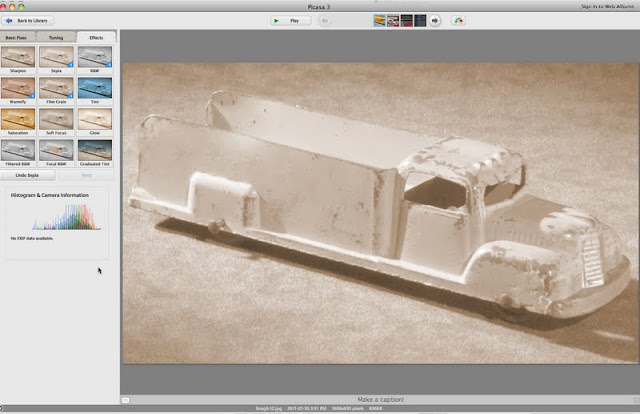
A Sepia Effect using a command from the "Effects" Menu
I find this image too light and low in contrast.

 
So I went to the "Basic Fixes" menu, and increased the contrast

I then went to the "Tuning" menu and made the shadows darker.

Wow! 
This instalment was the fastest one that I have ever written.
The Picasa software is great if you need a quick fix.

1. It is a small-siezed file, so using it will be fast.
2. It's easy to learn.
3. You can always undo.

Be Sure to make a copy of your original image, before you work on any original image. 

I'm sure there's a way in Picasa to do make a copy or save the final image as something else, but I didn't do that. When I have more time, I'll try to remember to work on that.


Saturday, July 30, 2011

Snagit-A Window Capture Software

July 30, 2011


Wow, it's July 30 already. Time surely does fly, especially as you get older.

I taught pro photography at a junior college here in Montreal,Quebec,Canada, and used to write books for my courses. They'd be posted on the college's server  in PDF (Adobe) format  for students to access.

One of the programs that I "discovered" while being on the Net one day was Snagit. It's a fairly inexpensive program that allows you to capture a screen, or crop a portion of the screen, or capture a scrolling window. The reason that I got this program was that I got tired of having to remember the commands on a PC  At the time, the PC was what I mostly used. Right now, it costs $ 50.00 US, and if you're an educator or a student (I think) you get a discount with proof. The company that produces Snagit is called TechSmith.

I thought that I could capture even the Snagit window, but I couldn't, so I ended up using something called Grab that comes with an Imac. 
So if you're happy with Grab,then you don't need Snagit.

The Snagit Icon

When you capture something with the program, you get the image of the capture, as well as the other images below the main large image. The captured image is saved as a TIFF file, so if you want to use it you should save it as a JPEG, which is more versatile. I usually save the captures to my desktop for ease of access.

This is the one of the menus that you use.
The program is small, so the learning curve is easy and intuitive.

There different menus that allow you to do different things.
I rarely use the menus, but the above one might be useful.
You can add a note to your screen capture.

I distorted the image above with 1 of the commands in another menu.
I'm showing you this, but I have really no use for this command to date.

Here's a submenu with commands such as re-size, comment, arrows, write, MagicMark, 
blur a portion, erase and a few other commands.

A menu (same as above) with shortcuts.
*Click on the above image to enlarge it, as well as the images to follow if they have menus.
In this way you'll be able to read "the fine print".

With this menu, you can copy and paste, check for spelling errors, and so forth.

This menu has commands such as zoom, zoom in and out, view next image.


A straightforward Photoshop screen capture.

As you can see, there's nothing "fancy" about this program.
I use it because it's simple, and keeps all of the image captures in small image 
size below the latest capture.

That's about it for today - just like the SnagIt program - short and sweet!


Friday, July 29, 2011

Examining a Newly-Acquired Toy

July 29, 2011


Today's instalment has to do with the examination of a newly-acquired toy. Sometimes, there's no blame to place on an e-Bay seller or any other source or person for buying. Unless you are actually "on the spot", you can't really judge a photo by it's photo.


However, items do arrive, and I photograph them for re-sale. What then happens is that you start to see defects, dents, missing parts, and cracks that weren't described with the original write-up or description. Not everyone will spend the time or have the time to describe toys with all of their "faults", and some people just won't! However, I try and think that most people are in fact honest.


Today, with instant results form your digital camera, and with being able to magnify any image by 5x 0r 400%, any faults may be detected. However, if you use a side lighting or texture lighting, you most certainly will bring out any dent,bend, hole, or breakage in most items.


Side lighting or texture lighting have the lighting positioned at an angle to skim light off the side of the surface. Consequently, there will be lots of bright areas (highlights) and dark areas (shadows). Use a flashlight to save time if you do not photograph many images of your item for sale or resale. Positioning the flashlight at a sharp angle will surely bring out the texture and all faults!


A newly-acquired Tootsietoy Vintage Truck

If you magnify the above image, you'll see that even I photograph the item properly with good detail all over. That means that there are not deep shadows. However, softer or flatter lighting, doesn't bring out the faults. I will describe them in my description.

So let's look at 2 different light set-ups - 1 is texture, and the other is flat.

Flat Lighting
The 2 dents on each side panel toward the end do not show well.

Texture Lighting
With this lighting, the dents in the panels present themselves better.

Flat Lighting
The larger and smaller dents in the roof do not show

Texture Lighting
The larger and smaller dents in the roof show very well.

Texture Lighting 
 A different angle of the subject to the light and camera.
The larger dent really shows well, but the small dent does not.

So you can see how changing the light position, as well as the subject position can help bring out the faults of an old toy.

There's 1 more thing to mention. That is, breaks or faults that won't necessarily appear through lighting or that both the seller and the buyer might not be aware of.

The seller did inform me of the dents in the roof, and the crack just above the windshield, between the first and second light.

But can toy tell what additional problem there is here?
The front window centre post was broken off!
I created the missing part in Photoshop.

So if you're a buyer or seller:

1. Carefully check your toys before either buying or selling. 

2. Always ask questions! 

a. Most sellers will answer your questions.
b. Give the seller plenty of time to answer!

3. Buy books or do a search for a photo of this toy on the Net.

a. This will help you determine the condition and how much you are willing to pay.
b. Will show you what a toy in better condition looks like and what parts it has or hasn't.


Monday, July 25, 2011

Photo Management Software

July 25, 2011
Photo Management Software
Adobe Lightroom and Apple Aperture

     With the era of the digital camera, people started to take more and more photos. However, the photos also became digitized, and most are never printed. Somehow, there had to be a way of sorting, cataloging, and adjusting the photos. So as they say, create a need, and someone will invent the solution. 

      With the need, 2 companies decided to create the solution, and the 2 "solutions" came out almost 1 after the other. The 2 of course for those familiar with Photo Image Cataloging Software are of course - Adobe and Aperture. For those on a limited budget, you can download for free Picasa.

      Basically, what these 2 programs do is allow you to store your photos in what is called a library. A digital library is the same as the traditional library in that you have the books, sorted into sections, and then catalogued by numbers, and then "reviewed". However, Lightroom and Aperture go one step further, by allowing you to process and develop your images. This simply means to use a condensed form of photo-editing software such as Photoshop.

     I taught for 32 years, so I always had to be up-to-date with the latest software. Being a teacher allowed me to have "teacher discounts", so that's why I have these 2 softwares. They were much less-expensive than the retail versions.

    I don't use them as much as I should! If you take a lot of photos, you should use the software (either one) every time that you download photos, because if you become "lazy", you end up with a monumental task, and you just don't feel like doing that! However, if you do use the software, and use it properly,it does save you a lot of time and effort. This is especially true, when you have to search for a particular photo from a collection of 50,000 images. And believe me, it doesn't take long to shoot 50,000 images - you'd be surprised!

So let's have a look at the 2 softwares and I'll show you most of the features of them, just to give you a rough idea of what they're about, and what they can do. I'll try to avoid any preference, because I can use them both equally well, and it's more up to you to decide. Don't forget that most software companies will allow you to download a trial version of their software for 30 days.

Don't forget that you can click on any image to enlarge it!

Apple Aperture
Here's an opening window in Aperture.
On the left, notice the folders that contain all of the photos.
In the middle are the actual photos.

You can select from different viewing options.
The above option shows you the folder photos in small size.
When you click or move your keyboard arrow left or right on a small image, the larger one will appear above.

With a click of the mouse, you can then have a full-screen view of the image that you selected.

I've enlarged this particular photo to show you how you can "catalogue" your images.
There is the shooting information on the left, and then you have rectangular spaces where you can add words to remember your photo. The words will then allow you to bring up all images that had similar words. Had I inserted into the keywords space "antique cast iron car", then when I didi a search for these 4 words, all of the images that I had given the same words, would appear.

This image shows you the default listings that come with the software.
You can add new categories as you develop an understanding of the catalogue system.
The words Import and Export allow you to add new images (Import) to the software library, or to send (Export) images to the desktop for further use.

Here's a sample window-capture of some of my folders and files.

A window-capture of the photo-editing software menu.
If I remember correctly,both programs will let you edit a photo and most importantly 
save the original file, and make a new image of the modifications!  

Adobe Lightroom 

Adobe Lightroom is a similar photo-cataloging and image-editing software to Apple Aperture.
Here's a Lightroom portion showing  the search area that will help find you an image.

Here's the window view of my dog Buddy


A full working window view.
The left side is the search section and cataloging area.
The middle is a large image view.
The right side is the image adjustment area.
The bottom is the viewing area of the folder images.

A window capture to show you the area where the actual information of your particular image is.

I've only presented you with a glimpse of what these 2 programs are all about. However, they're excellent when you photograph a lot, need to be organized, and need to edit your images fast. If you only shoot a few photos every week or month, then your own image-editing software like Photoshop Elements will do, and you undoubtedly will do your own cataloging.


Sunday, July 24, 2011

Public Photography Display - Part I - Picasa

July 24, 2011


Public Internet Photography Display
Part I 
 Picasa

     There are many places on the Net where you can upload your photos. I was just adding a few images to one of the sites, when I got a "Eureka moment" and that's what I decided would be today's instalment. For those of you who don't know what I'm talking about, there are places on the Internet that allow you to place your photos on their site. There are different controls that you can add such as "let everyone see your photos", restrict the viewing top your friends" and so forth.

    I started to add my photos first on a site called Flickr, and later on a site called Picasa, which is the one that I'll talk about today, since I already have it open. Picasa allows you to upload a GBN of photos, which by today's standards is not a lot. However that's plenty for most people. However, for a small amount of money, you can increase that volume to satisfy your every wish.

    I'm going to present to you the basics through my usual visual methods - photos.


The above is what your page looks like. The resolution is not that clear, so what i'll do is present parts of it to you in order for you to get to know the benefits and features of this site.

 1.Web Photo Albums - Altogether

Picasa has spent their time well figuring out how most people would like to present their photos. In the above case, I have what are called "albums". You create a title. although Picasa will provide you with a default title by date. I use both a date and a title.

2. 1 of my Albums
Below is my album titled: July 6,2011 - Wyandotte China Clipper Airplanes
If you look closely you'll see that I 've titled 1 of the photos:
"1 of 4 different Versions of...."

3. The image enlarged
You can see the title below the photo.
I haven't had the time to add captions to all of my photo, but I'm sure for most people not knowing what a "Wyandotte China Clipper" is, a small note would help.

4. Guest Comments
Below the photo, people can add comments if you so wish. In this case, I added my own comment.
4. Tags
A good idea, and Picasa has thought of this, is to add "tags". Tags are simply words or phrases that you add by bringing up a small window. These words or phrases will help anyone who  is looking for something in particular.

I used the following "tags" for the above photo"

"Wyandotte", China Clipper" "Wyandotte Toy" "Wyandotte Airplane" "Toy Airplane"

You can see where the tags are on the page.Also, you can add more tags or remove tags.


4. Adding More Tags
You can always add or remove tags. 
Below I've added a few more tags:
"Antique Toy" and "Vintage Toy"

You use brackets "  "" to separate each tag

5. Viewer Count
You can see how many people have dropped by to view your photo 
I like this feature because it gives me a good feeling to know that others are looking at my  photos!

6. Photo Information
You can provide photo information automatically.
If you didn't know already, your camera automatically does this.
Personal computer programs such as Lightroom and Aperture automatically upload this information, and so does Picasa.
Below is the information from the photo of the Wyandotte China Clipper.
The image is a bit "fuzzy",but if you go to my Picasa site, you'll get to see all of my photo and data.


My pseudonym on Picasa is major trout.
You'll have to do a search "Wyandotte China Clipper" to find me.


7. Finding "Wyandotte China Clipper"
When you enter the above words in the upper right hand corner of the page, you'll get the results as you see below, showing that there are 84 results.

8. The photo results for "Wyandotte China Clipper"

You can see that some trucks have been included. I either made an error and kept "copy and pasting" the sam tags, or perhaps Picasa has thought that viewers might also want to see other photos of mine.


8. Viewing each Image Enlarged (Magnified)
You can look at any image enlarged and you can even zoom in to look at certain features.
The small insert in the lower right corner is a slider/magnifier. You move the slider to the right to magnify.